Printing from CorelDRAW
Right click on file → “Open with program” → Choose “CorelDRAW”
For the pop-up, choose “curved line”
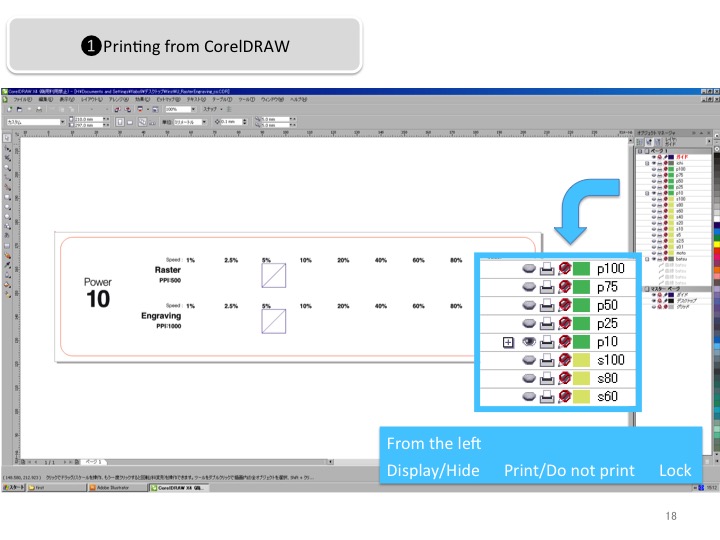
Except for the layer that you will print, you need to click the “Print/do not print” printer icon and set everything up
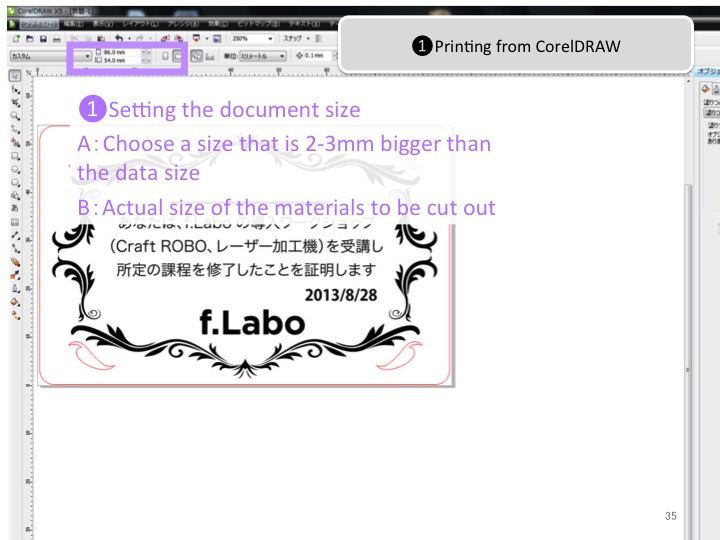
Set the document size to a size 2~3mm bigger than the processing data
When you want to process at a fixed position on the processing material, you can set it to the actual size of the materials to be cut out
When setting the document size, you should undo selection of an object → Object size will be changed
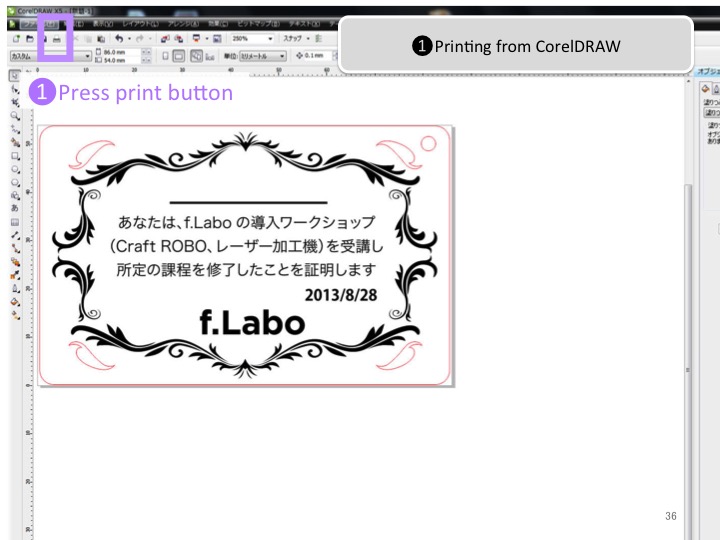
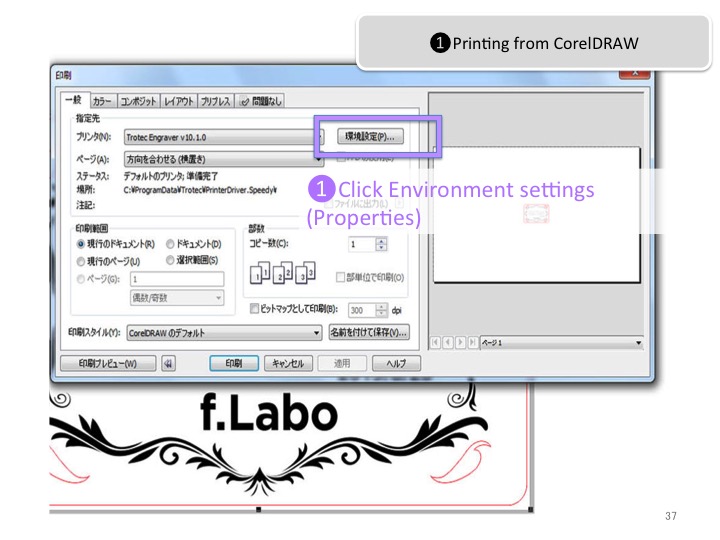
Go to “File” on the Menu Bar, and click “Print”
Click “Environment settings”
Settings for materials with specialized software
Input the set document size
Select settings for materials and thickness
Confirm if image is black/white, and whether trotec can be read
Press “JC” button, and send data to JobControl

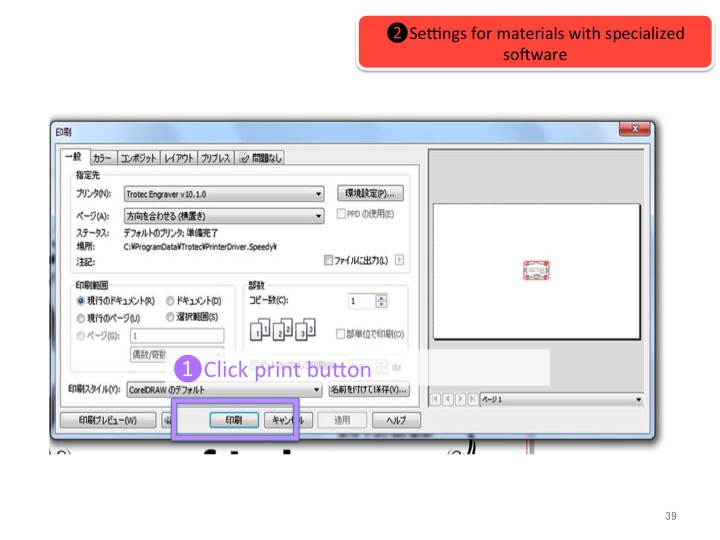
Click print button
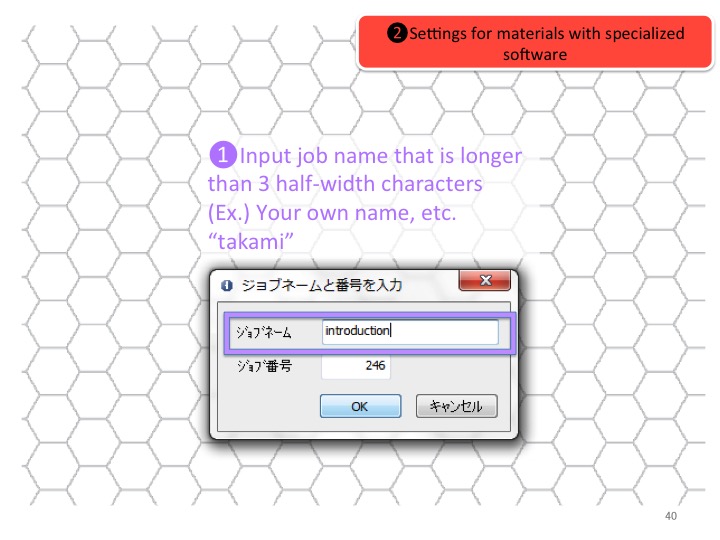
Input job name
Input a name that is longer than 3 half-width characters
Leave job number as it is
When the “JC” icon at the bottom of the screen turns yellow, click it and you will move to “JobControl”
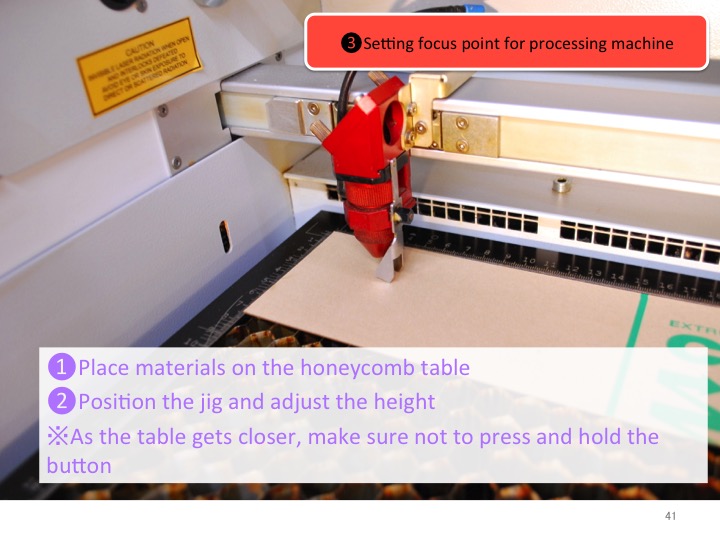
Setting focus point for processing machine
Place materials on the honeycomb table
Position the jig, and adjust the table height
As the table gets closer to the jig, make sure not to press and hold the button
※When placing a material on the black rack that is too big, make sure to place a 2mm piece of acryl between the material and the table
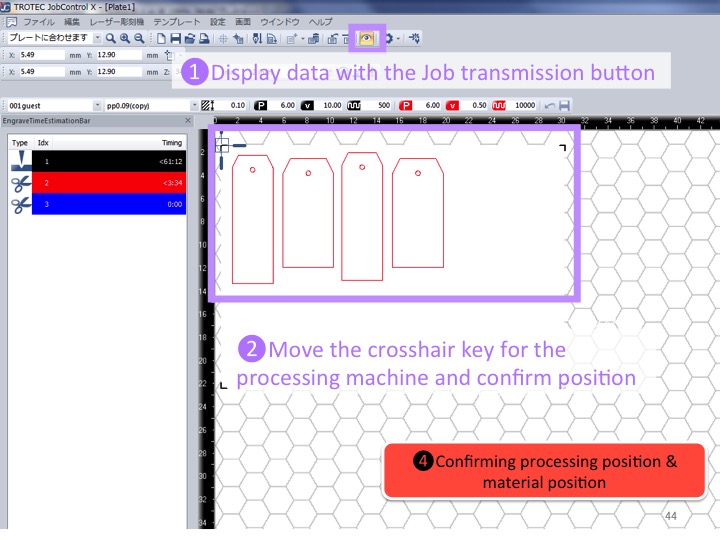
Confirming processing position & material position
Drag & drop your job from the “Job List” on the JobControl screen to the processing area
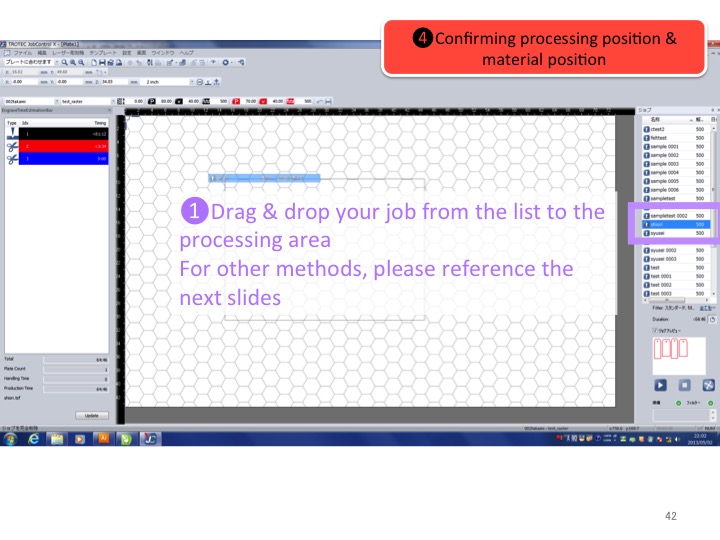
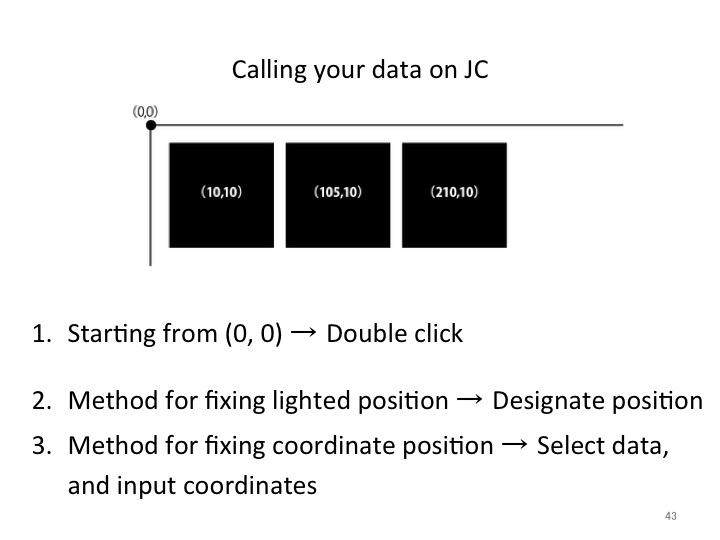
Other methods
When starting from the upper left starting point → Double click the file name on the list
When starting from the position lighted on the materials → Decide the position on the processing machine, and drag & drop the crosshair on the JC
Method for fixing coordinate position → Put the data into selective condition, and input the coordinates into the JC screen
Display data with the “Job transmission button”
Move the crosshair key for the processing machine, and confirm position
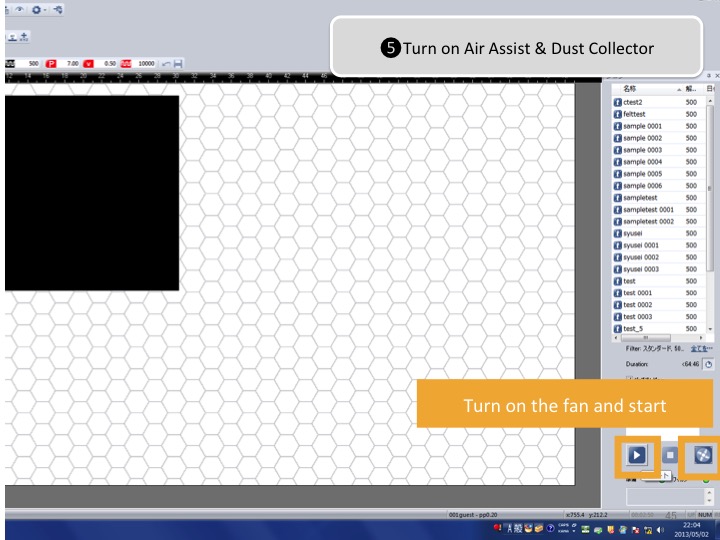
Start processing
Start the fan on the right edge, press the start button on the left side, and start processing
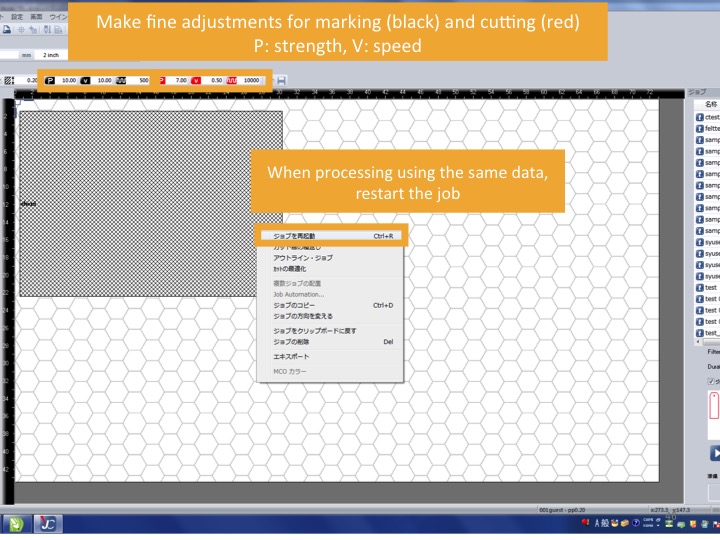
[When re-processing using the same processing data]
Right click data → “Restart job”
Order of the items in the Dust Collector (This may change depending on the season and materials to be processed)
When the filter has become clogged, it is necessary to change the second tissue
If the percentage does not go down, please consult the staff


Remove items and clean
A link to a write-up will be posted at a later date